First impressions of Rust smart contracts with Substrate and Ink, part 3
This is part 3 of my 3 part series on getting started with Substrate and Ink.
- Part 1: Wandering around the Polkadot docs
- Part 2: Building a blockchain with Substrate
- Part 3 (this part): Creating a contract with Ink and running it on the Canvas network
In the previous post I built and ran my own Substrate-based blockchain, thinking that would be a necessary step toward writing a smart contract for Substrate.
Now I’m going to try to actually write a Substrate contract in Ink.
In this post
- Really, let’s write an ink contract
- Creating an ink project
- Building for wasm
- Interlude: What the ink macros actually emit
- Running a canvas dev node
- Running my own canvas-ui
- Uploading a contract to a canvas devnet
- Executing the contract in the canvas-ui
- The contract bundle
- Wiping the dev chain
- Aside: canvas-ui gets out of sync with the on-chain state
- (Failing to) deploy from the command line
- In Conclusion
Really, let’s write an ink contract
Ok, I’ve gotten lost in the docs and don’t actually know where to look to start writing a smart contract.
I’m going to go to the Substrate Tutorial Catalog and see if there’s an ink tutorial there.
There is:
It’s got a cute crab picture on the front page.
I notice that this tutorial has a different visual style than the last one, even though they are on the same site. It looks like this one was designed as a slide deck for a workshop, so it’s understably presented differently, but I am starting to get the impression that even though there’s quite a lot of Substrate/Polkadot docs, they are inconsintently integrated into a single, comprehensible, whole.
On first glance, this tutorial appears to re-cover the substrate node setup we’ve already done to this point. So probably we could have just started right here, and not done the previous tutorial.
(Hero Bird later tells me that this is a good place to start learning Ink).
This includes similar instructions for setting up the nightly toolchain:
rustup component add rust-src --toolchain nightly
rustup target add wasm32-unknown-unknown --toolchain stable
And I note that it does not mention the specific nightly-2020-10-05 toolchain that
we found works.
So probably anybody that runs this tutorial,
like the last one,
is going to run into mysterious build errors.
I plan to attempt to follow the build commands as-written in the tutorial,
then adjust them as needed to use the working toolchain.
The first step in the tutorial that I haven’t already done is “Installing the Canvas Node”. I don’t know what a canvas node is, but let’s do it.
The command for it is
cargo install canvas-node --git https://github.com/paritytech/canvas-node.git --tag v0.1.3 --force
So canvas-node is some kind of tool,
written in Rust.
I open the canvas-node GitHub.
It is described as “Node implementation for Canvas, a Substrate chain for smart contracts.”
I’ve learned something new. The earliest docs led me to believe there were no live parachains for smart contract development, then we learned about Moonbeam, and now we learn about Canvas.
It seems like the previous work we did to build our own Substrate chain was not needed at all, and that for now we are going to be using Canvas.
I check the latest tags for canvas-node and v0.1.3 is the latest,
so the tutorial is up to date.
I run the command to install canvas-node.
The command fails during the build:
   Compiling sc-cli v0.8.0 (https://github.com/paritytech/substrate#11ace4ef)
error[E0107]: wrong number of type arguments: expected 10, found 9
   --> node/src/service.rs:157:14
    |
157 |         let aura = sc_consensus_aura::start_aura::<_, _, _, _, _, AuraPair, _, _, _>(
    |                    ^^^^^^^^^^^^^^^^^^^^^^^^^^^^^^^^^^^^^^^^^^^^^^^^^^^^^^^^^^^^^^^^^ expected 10 type arguments
It’s a build failure.
I clone canvas-node myself,
check out the same version from tag v0.1.3,
and build it
git clone https://github.com/paritytech/canvas-node.git
cd canvas-node
git checkout v0.1.3
cargo build --release
Surprisingly this build succeeds.
I note in the output of both builds,
the substrate git revision being compiled is different
in the cargo install invocation
than the cargo build invocation from inside the repo:
$ cargo install canvas-node --git https://github.com/paritytech/canvas-node.git --tag v0.1.3 --force
...
   Compiling sc-offchain v2.0.0 (https://github.com/paritytech/substrate#11ace4ef)
   Compiling sc-informant v0.8.0 (https://github.com/paritytech/substrate#11ace4ef)
...

$ cargo build --release
...
   Compiling sc-consensus-slots v0.8.0 (https://github.com/paritytech/substrate#cab98654)
   Compiling substrate-build-script-utils v2.0.0 (https://github.com/paritytech/substrate#cab98654)
...
In one it cargo is using commit 11ac, the other cab9.
cab9 is the correct one per the lockfile,
so it seems like cargo install is ignoring the lockfile.
I google for “cargo install ignores lockfile” and find
a relevant issue.
It’s a long thread from 2019 and I don’t read it all,
but it seems like this is a bug.
The thread indicates there’s a new --locked flag that should obey the lockfile.
I try the original cargo install command again,
but this time with --locked:
$ cargo install canvas-node --git https://github.com/paritytech/canvas-node.git --tag v0.1.3 --force --locked
This works.
I submit a PR to fix the tutorial.
The canvas-node release build takes 31 minutes.
That’s pretty rough, even for a Rust project.
Creating an ink project
Moving on to the next step:
https://substrate.dev/substrate-contracts-workshop/#/0/creating-an-ink-project
I create a new contract with cargo contract
$ cargo contract new flipper
        Created contract flipper
This creates a new flipper directory containing Cargo.toml and lib.rs,
so a simple Rust library.
Cargo.toml:
[package]
name = "flipper"
version = "0.1.0"
authors = ["[your_name] <[your_email]>"]
edition = "2018"

[dependencies]
ink_primitives = { version = "3.0.0-rc2", default-features = false }
ink_metadata = { version = "3.0.0-rc2", default-features = false, features = ["derive"], optional = true }
ink_env = { version = "3.0.0-rc2", default-features = false }
ink_storage = { version = "3.0.0-rc2", default-features = false }
ink_lang = { version = "3.0.0-rc2", default-features = false }

scale = { package = "parity-scale-codec", version = "1.3", default-features = false, features = ["derive"] }
scale-info = { version = "0.4.1", default-features = false, features = ["derive"], optional = true }

[lib]
name = "flipper"
path = "lib.rs"
crate-type = [
	# Used for normal contract Wasm blobs.
	"cdylib",
]

[features]
default = ["std"]
std = [
    "ink_metadata/std",
    "ink_env/std",
    "ink_storage/std",
    "ink_primitives/std",
    "scale/std",
    "scale-info/std",
]
ink-as-dependency = []
It links to a bunch of ink crates, as well as crates for something called “scale”,
it also turns on a bunch of “std” features.
That’s curious because it implies ink contracts will use the standard library.
Since contracts don’t run in a traditional OS,
I wonder if they have their own fork of std,
or otherwise what this means.
This tool also has put lib.rs in a nonstandard place,
in the top-level directory instead of a src subdirectory.
Personally, I’m ok with that,
and some of my own multi-crate projects do the same
to avoid a proliferation of src dirs that don’t accomplish much
while also making project directory traversal more tedious.
For a standard tool though I might expect this to follow the standard layout.
This project is also a cdylib.
That might suggest that it is using a special loading scheme,
or maybe all wasm projects are output as “cdylibs”.
The lib.rs file:
#![cfg_attr(not(feature = "std"), no_std)]

use ink_lang as ink;

#[ink::contract]
mod flipper {

    /// Defines the storage of your contract.
    /// Add new fields to the below struct in order
    /// to add new static storage fields to your contract.
    #[ink(storage)]
    pub struct Flipper {
        /// Stores a single `bool` value on the storage.
        value: bool,
    }

    impl Flipper {
        /// Constructor that initializes the `bool` value to the given `init_value`.
        #[ink(constructor)]
        pub fn new(init_value: bool) -> Self {
            Self { value: init_value }
        }

        /// Constructor that initializes the `bool` value to `false`.
        ///
        /// Constructors can delegate to other constructors.
        #[ink(constructor)]
        pub fn default() -> Self {
            Self::new(Default::default())
        }

        /// A message that can be called on instantiated contracts.
        /// This one flips the value of the stored `bool` from `true`
        /// to `false` and vice versa.
        #[ink(message)]
        pub fn flip(&mut self) {
            self.value = !self.value;
        }

        /// Simply returns the current value of our `bool`.
        #[ink(message)]
        pub fn get(&self) -> bool {
            self.value
        }
    }

    /// Unit tests in Rust are normally defined within such a `#[cfg(test)]`
    /// module and test functions are marked with a `#[test]` attribute.
    /// The below code is technically just normal Rust code.
    #[cfg(test)]
    mod tests {
        /// Imports all the definitions from the outer scope so we can use them here.
        use super::*;

        /// We test if the default constructor does its job.
        #[test]
        fn default_works() {
            let flipper = Flipper::default();
            assert_eq!(flipper.get(), false);
        }

        /// We test a simple use case of our contract.
        #[test]
        fn it_works() {
            let mut flipper = Flipper::new(false);
            assert_eq!(flipper.get(), false);
            flipper.flip();
            assert_eq!(flipper.get(), true);
        }
    }
}
So the first thing this does is conditionally turn off std.
Now I have an idea of why the manifest has a bunch of std features:
given the presence of unit tests here,
I guess that,
when testing,
the ink libraries are built with mock capabilities that depend
on the standard library,
and when not testing,
they are built with capabilities derived from the substrate no-std runtime.
This file has a bunch of ink attributes,
which surely invoke complex code-generation macros.
This is typical of Rust smart contracts,
but also of embedded Rust projects generally:
these types of programs have their own non-standard runtime setup
that is just a bunch of boilerplate,
and hiding that boilerplate beneath macros is often seen as desirable.
The Rust standard library itself does a similar runtime setup routine
before executing a standard main function.
I would be curious to see the underlying code emitted by these macros.
We see here several macros and here are my guesses as to what they do. These are just guesses!
#[ink::contract]- emit whatever entry point is required by the Substrate runtime. Also establish a context for interpreting the remaining ink macros.#[ink(storage)]- emit the special serialization required by smart contract storage.#[ink(constructor)]- emit the appropriate runtime method dispatch for constructing theFlippercontract and serializing it into the blockchain.#[ink(message)]- emit the appropriate runtime method dispatch for running smart contract methods.
The use of these macros is probably why ink is described as an “embedded domain specific language”. I’m curious if there are other aspects of the ink library that make it a DSL, but so far this is pretty lightweight as a DSL, just plain Rust with some runtime glue. Which is a good thing to my mind.
I see that the unit tests aren’t doing any special mock setup
in order to test contracts.
I’m guessing that is because the std features do that themselves.
This contrasts with NEAR,
where mocking is set up manually in code.
I don’t have enough experience yet to know which approach to prefer.
The contract itself is trivial:
initialize a contract that bears a boolean,
optionally with a value.
Call flip to change the value;
call get to read the value.
Testing requires nightly:
$ cargo +nightly test
     Running target/debug/deps/flipper-4dfd5047053abd9b

running 2 tests
test flipper::tests::default_works ... ok
test flipper::tests::it_works ... ok

test result: ok. 2 passed; 0 failed; 0 ignored; 0 measured; 0 filtered out
Oh, no it doesn’t:
$ cargo test
     Running target/debug/deps/flipper-2d62f1e2378cf363

running 2 tests
test flipper::tests::default_works ... ok
test flipper::tests::it_works ... ok

test result: ok. 2 passed; 0 failed; 0 ignored; 0 measured; 0 filtered out
Maybe the tutorial is just priming the reader to always build with nightly, since presumably the final wasm contract requires nightly.
Building for wasm
Continuing at the next page of the tutorial:
https://substrate.dev/substrate-contracts-workshop/#/0/building-your-contract
Substrate contracts are compiled to wasm.
The cargo contract tool that we installed earlier handles some of the details
of choosing the wasm target.
The command to compile the contract is
$ cargo +nightly contract build
 [1/3] Building cargo project
  Downloaded compiler_builtins v0.1.36
  Downloaded 1 crate (155.3 KB) in 0.41s
   Compiling compiler_builtins v0.1.36
   Compiling core v0.0.0 (/home/ubuntu/.rustup/toolchains/nightly-x86_64-unknown-linux-gnu/lib/rustlib/src/rust/library/core)
   Compiling rustc-std-workspace-core v1.99.0 (/home/ubuntu/.rustup/toolchains/nightly-x86_64-unknown-linux-gnu/lib/rustlib/src/rust/library/rustc-std-workspace-core)
   Compiling alloc v0.0.0 (/tmp/cargo-xbuildIjCczX)
    Finished release [optimized] target(s) in 17.01s
   Compiling proc-macro2 v1.0.24
...
Well, this is interesting -
cargo contract builds the core library itself.
I wonder why.
It’s a rare thing to do.
Let’s look at cargo-contract.
Here’s its underlying invocation of cargo,
reproduced here:
    std::env::set_var(
        "RUSTFLAGS",
        "-C link-arg=-z -C link-arg=stack-size=65536 -C link-arg=--import-memory",
    );

    let cargo_build = |manifest_path: &ManifestPath| {
        let target_dir = &crate_metadata.cargo_meta.target_directory;
        util::invoke_cargo(
            "build",
            &[
                "--target=wasm32-unknown-unknown",
                "-Zbuild-std",
                "-Zbuild-std-features=panic_immediate_abort",
                "--no-default-features",
                "--release",
                &format!("--target-dir={}", target_dir.to_string_lossy()),
            ],
            manifest_path.directory(),
            verbosity,
        )?;
        Ok(())
    };```
So ink’s build tool is customizing the build heavily,
passing arguments to the wasm linker via rustc using the RUSTFLAGS
environment variable,
and also setting a variety of cargo flags,
some unstable.
Let’s look at some of them:
-
-C link-arg=-z -C link-arg=stack-size=65536.-C link-arg=is the way to tellrustcto pass flags to the linker. From the wasm32 target spec we see that the linker for wasm islld, the linker from the LLVM project. So if we go to the lld documentation for wasm we can probably find out what these flags do.This invocation is fascinating: the underlying arguments to
lldhere are-z stack-size=65536, but to tellrustcto pass these arguments, takes two invocations of-C link-args. Pretty ugly.Anyway, what seems to be happening here is that
cargo contractis tellingrustcto telllldto set the size of the main stack to 64k.I don’t know where the documentation for this flag is though. A Google search suggests this may be a wasm-specific lld flag.
-
-C link-arg=--import-memoryThis one should be easier to understand, as it is documented directly on the lld wasm page. Unfortunately, the doc says this about it:
“Import memory from the environment.”
Ok … what does that mean?
A hint from some Rust wasm page suggest that this means the wasm runtime will provide the buffer for the program’s RAM, instead of the default of the RAM buffer being provided by the program itself. This allows RAM to be shared between wasm programs. I don’t know what substrate is using it for.
-
--target=wasm32-unknown-unknownThis is telling the compiler to use the typical wasm target.
-
-Zbuild-stdThis is why
cargo contractrebuilt the core library. This is a nightly-only flag that rebuilds the std (or core) library, which can be useful to e.g. build with processor-specific codegen options. In this case the rebuild seems to be in order to set a feature flag, below. -
-Zbuild-std-features=panic_immediate_abortThis is new to me. It makes panics abort silently, which avoids a big chunk of code generation necessary for panic messages, which is wasteful for embedded software.
-
--no-default-featuresThis is to turn off the
stdfeature of our ownflippercrate, and thus, presumably, to compile without test mocking built in. This is important to know - any features I add to a contract are going to be disabled bycargo contract.
That’s all interesting to know.
The contract build continues with
...
   Compiling flipper v0.1.0 (/tmp/cargo-contract_pOLtdS)
    Finished release [optimized] target(s) in 55.06s
 [2/3] Post processing wasm file
 [3/3] Optimizing wasm file
wasm-opt is not installed. Install this tool on your system in order to
reduce the size of your contract's Wasm binary.
See https://github.com/WebAssembly/binaryen#tools

Your contract is ready. You can find it here:
/home/ubuntu/substrate/flipper/target/flipper.wasm
The final step is some optional post-processing using the wasm-opt tool that I don’t have installed.
As part of the build, we also need to generate some metadata about the contract, with:
$ cargo +nightly contract generate-metadata
...
    Finished release [optimized] target(s) in 2m 31s
     Running `target/release/metadata-gen`
        Your metadata file is ready.
You can find it here:
/home/ubuntu/substrate/flipper/target/metadata.json
This file contains the “contract ABI”, which, if it is like Ethereum, is probably a representation that JavaScript can use to interact with the contract via the Substrate RPC mechanism.
Here’s the full contents:
{
  "metadataVersion": "0.1.0",
  "source": {
    "hash": "0x36431d9da78a6bb099474e49c9e35a9c3a04272b58815634082626109826cac6",
    "language": "ink! 3.0.0-rc2",
    "compiler": "rustc 1.49.0-nightly"
  },
  "contract": {
    "name": "flipper",
    "version": "0.1.0",
    "authors": [
      "[your_name] <[your_email]>"
    ]
  },
  "spec": {
    "constructors": [
      {
        "args": [
          {
            "name": "init_value",
            "type": {
              "displayName": [
                "bool"
              ],
              "type": 1
            }
          }
        ],
        "docs": [
          " Constructor that initializes the `bool` value to the given `init_value`."
        ],
        "name": [
          "new"
        ],
        "selector": "0xd183512b"
      },
      {
        "args": [],
        "docs": [
          " Constructor that initializes the `bool` value to `false`.",
          "",
          " Constructors can delegate to other constructors."
        ],
        "name": [
          "default"
        ],
        "selector": "0x6a3712e2"
      }
    ],
    "docs": [],
    "events": [],
    "messages": [
      {
        "args": [],
        "docs": [
          " A message that can be called on instantiated contracts.",
          " This one flips the value of the stored `bool` from `true`",
          " to `false` and vice versa."
        ],
        "mutates": true,
        "name": [
          "flip"
        ],
        "payable": false,
        "returnType": null,
        "selector": "0xc096a5f3"
      },
      {
        "args": [],
        "docs": [
          " Simply returns the current value of our `bool`."
        ],
        "mutates": false,
        "name": [
          "get"
        ],
        "payable": false,
        "returnType": {
          "displayName": [
            "bool"
          ],
          "type": 1
        },
        "selector": "0x1e5ca456"
      }
    ]
  },
  "storage": {
    "struct": {
      "fields": [
        {
          "layout": {
            "cell": {
              "key": "0x0000000000000000000000000000000000000000000000000000000000000000",
              "ty": 1
            }
          },
          "name": "value"
        }
      ]
    }
  },
  "types": [
    {
      "def": {
        "primitive": "bool"
      }
    }
  ]
}
It’s mostly self-explanatory.
What strikes me is that so much of this metadata comes directly from the Rust code,
and this requires a sophisticated amount of integration with the Rust toolchain.
Though, thinking about it,
that integration is probably nearly the same as necessary for the operation of
the ink macros,
so the ink macros and this metadata generation tool probably share a lot of code.
Before moving on to running this code, I want to try one other thing.
Interlude: What the ink macros actually emit
As mentioned earlier,
ink, like other “embedded” Rust platforms,
uses macros to connect their special runtime to the world of Rust code.
I very much want to know what it is these ink macros are doing.
We should be able to tell the compiler to show us the result of
macro expansion.
I just don’t know how offhand.
I think I recall some custom tools that make the process of expanding Rust macros easy, so I google for “rust macro expand cargo”, and indeed I find:
This a dtolnay tool so I know this is the one to use, dtolnay having built many good and important Rust dev tools.
I install it with
cargo install cargo-expand
(While I’m waiting for it to build I add it to my list of Rust tools).
I try running it with
cargo expand --no-default-features
using --no-default-features because I assume that
having the “std” feature active will effect the output of the macros.
This doesn’t quite work, and I get a compilation error:
    Checking ink_env v3.0.0-rc2
error: ink! only support compilation as `std` or `no_std` + `wasm32-unknown`
  --> /home/ubuntu/.cargo/registry/src/github.com-1ecc6299db9ec823/ink_env-3.0.0-rc2/src/engine/mod.rs:39:9
   |
39 | /         compile_error! {
40 | |             "ink! only support compilation as `std` or `no_std` + `wasm32-unknown`"
41 | |         }
   | |_________^
error[E0432]: unresolved import `crate::engine::EnvInstance`
  --> /home/ubuntu/.cargo/registry/src/github.com-1ecc6299db9ec823/ink_env-3.0.0-rc2/src/api.rs:29:9
   |
29 |         EnvInstance,
   |         ^^^^^^^^^^^
   |         |
   |         no `EnvInstance` in `engine`
   |         help: a similar name exists in the module: `OnInstance`
We probably have to set some other feature flag?
Oh, after looking at the source for this custom compiler error,
the solution is obvious:
we need to also add --target=wasm32-unknown-unknown.
So the right command to expand the ink macros should be
cargo expand --no-default-features --target=wasm32-unknown-unknown
I run it and get … well, the expanded code is too big to print inline here, but here it is in gist form.
The output is dense.
There’s a lot of codegen magic here.
It would take some careful reading to get insight into how ink actually works,
and for now I don’t want to do that.
I do note that program appears to define two entry points,
fn deploy() -> u32, and fn call() -> u32,
the behavior of the contract can presumably be traced from there.
Running a canvas dev node
Continuing the ink tutorial from
https://substrate.dev/substrate-contracts-workshop/#/0/running-a-substrate-node
Although ink (reportedly) works with any substrate chain that has the “contracts” pallete,
ink comes with its own chain for testing, canvas.
Earlier we installed it with cargo install canvas-node,
and now we’re going to use it to run a local devnet,
and deploy and test our contract.
I expect this process to be similar to when we ran our own substrate node,
since canvas is, I assume, a simple substrate chain.
The command we need to run a devnet is
canvas --dev --tmp
The --dev flag is presumably to create a devnet,
and I’m guessing that --tmp means that it will destroy any on-disk resources on exit.
These are the exact same flags we passed to our own substrate chain.
And running it…
$ canvas --dev --tmp
2020-11-25 00:05:57  Running in --dev mode, RPC CORS has been disabled.
2020-11-25 00:05:57  Canvas Node
2020-11-25 00:05:57  ✌️  version 0.1.0-e189090-x86_64-linux-gnu
2020-11-25 00:05:57  ❤️  by Canvas, 2020-2020
2020-11-25 00:05:57  📋 Chain specification: Development
2020-11-25 00:05:57  🏷 Node name: somber-thread-7554
2020-11-25 00:05:57  👤 Role: AUTHORITY
2020-11-25 00:05:57  💾 Database: RocksDb at /tmp/substrateBjvYLz/chains/dev/db
2020-11-25 00:05:57  ⛓  Native runtime: canvas-8 (canvas-0.tx1.au1)
2020-11-25 00:05:57  🔨 Initializing Genesis block/state (state: 0x76e4…0f61, header-hash: 0x70f1…6167)
2020-11-25 00:05:57  👴 Loading GRANDPA authority set from genesis on what appears to be first startup.
2020-11-25 00:05:57  ⏱  Loaded block-time = 6000 milliseconds from genesis on first-launch
2020-11-25 00:05:57  Using default protocol ID "sup" because none is configured in the chain specs
2020-11-25 00:05:57  🏷 Local node identity is: 12D3KooWDdvLqPW8gzaPBWgYjd6Q2yC2abk6713QykMfVAGHVtfr
2020-11-25 00:05:57  📦 Highest known block at #0
2020-11-25 00:05:57  〽️ Prometheus server started at 127.0.0.1:9615
2020-11-25 00:05:57  Listening for new connections on 127.0.0.1:9944.
2020-11-25 00:06:00  🙌 Starting consensus session on top of parent 0x70f1a0488a744075c07ca30d890d981697ffff0c2ef024e9753b9152afd46167
2020-11-25 00:06:00  🎁 Prepared block for proposing at 1 [hash: 0x50ff56ca14d680e03c3c1a2a231f27a1c4ffee2c52bba5a8459112f5a375c2ff; parent_hash: 0x70f1…6167; extrinsics (1): [0x115d…2969]]
2020-11-25 00:06:00  🔖 Pre-sealed block for proposal at 1. Hash now 0x0aee39eb04a2283232d41ca12ea1418f3215378455e2ea4e0e9312ec94553072, previously 0x50ff56ca14d680e03c3c1a2a231f27a1c4ffee2c52bba5a8459112f5a375c2ff.
2020-11-25 00:06:00  ✨ Imported #1 (0x0aee…3072)
Yep, looks like substrate.
The next step in the tutorial is to use the hosted canvas-ui at
https://paritytech.github.io/canvas-ui
to connect via RPC to the local node.
As usual, I’m doing my hacking on a remote EC2 server.
With my remote EC2 setup I already know this isn’t going to work and I need to have the proper SSH tunnel set up.
To test my assumption I navigate to that page. It looks like it is working, but I see that it has connected to the “Canvas Test” network, not my own local node.
I don’t know yet if “Canvas Test” is a real network, or a simulated test environment.
The tutorial instructions say it will connect to the local node by default, but it did not. I don’t know if this is because it automatically fell back to “Canvas Test” after failing to connect to the local node, but this could be an easy point of confusion for a less savvy user.
Anyway, the error I get when switching to the “Local Node” looks like this:
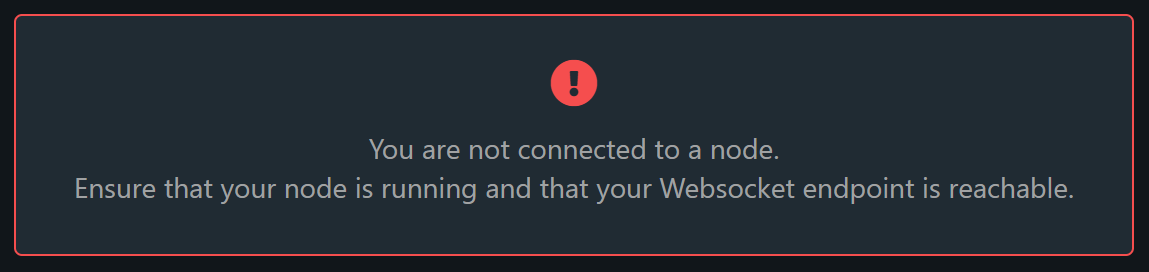
Even as it indicates an error there is a green circle next to “Local Node”, which would seem to indicate things are operating correctly, though they are not.

So I’m going to reestablish my ssh connection, with the same tunnel settings I used when I was testing substrate, and that will probably make the canvas-ui properly connect to my canvas node.
I reconnect my ssh tunnel with the same forwarding I used earlier with substrate:
ssh -A <my-server> -L localhost:8000:localhost:8000 -L localhost:9615:localhost:9615 -L localhost:9944:localhost:9944
Port 9944 is the port that matters here. That’s the RPC port the UI uses to connect to the substrate node. Port 8000 is the port we previously used for the substrate-front-end-template, and I don’t actually need it right now, since I am not running canvas-ui on my own. Port 9615 is the metrics port, which I am also not going to use.
But this I think is the set of ports I need to forward generally as a substrate developer.
Running my own canvas-ui
I don’t like the idea of relying on the hosted canvas-ui frontend while I’m hacking. Can I run it myself? Let’s try.
I’m assuming it’s going to be a lot like running substrate-front-end-template.
The repo is here:
No docs for it,
but I’m guessing we can follow the substrate-front-end-template docs.
I clone canvas-ui
git clone https://github.com/paritytech/canvas-ui.git
I run yarn install.
The output is very different than it was for the substrate-front-end-template;
this must be a more complex app.
After output about a million messages like
YN0013: │ yargs-parser@npm:20.2.4 can’t be found in the cache and will be fetched from the remote registry
The output completely stops.
htop says that node is doing stuff.
After 10 or 20 seconds the output resumes.
The whole build takes less than 4 minutes.
I run yarn start.
This server says it is listening on port 3001, so I adjust my SSH tunnel accordingly and navigate to http://localhost:3001 and it all seems to work.
The canvas-ui app has a several-step explanatory intro on first-connect, but while I’ve been getting things set up I skipped through it without reading. Now I don’t know how to get back to it.
The overall appearance is very polished though.
Looks like this:
Cool. I’m in control of all my tools now. Time to upload and run a contract.
Uploading a contract to a canvas devnet
Now I’m on on the “deploying your contract” page of the contract workshop:
https://substrate.dev/substrate-contracts-workshop/#/0/deploying-your-contract
The instructions for deploying a contract all go through the canvas UI. Which is cool for a tutorial, but I hope and assume there’s some command line way to do it as well.
Anyway, let’s do it the way the tutorial says.
Oh, since I’m doing my development on a remote machine, and running the UI on my local machine, I’ve got to do some special steps to work through this, specifically, I have to move the build artifacts that need to be uploaded, from my build machine, to my local machine that access the web UI.
Ok, I’m going to jump through the hoops to move my files around and do this, but then I’m going to figure out how to do it from the command line.
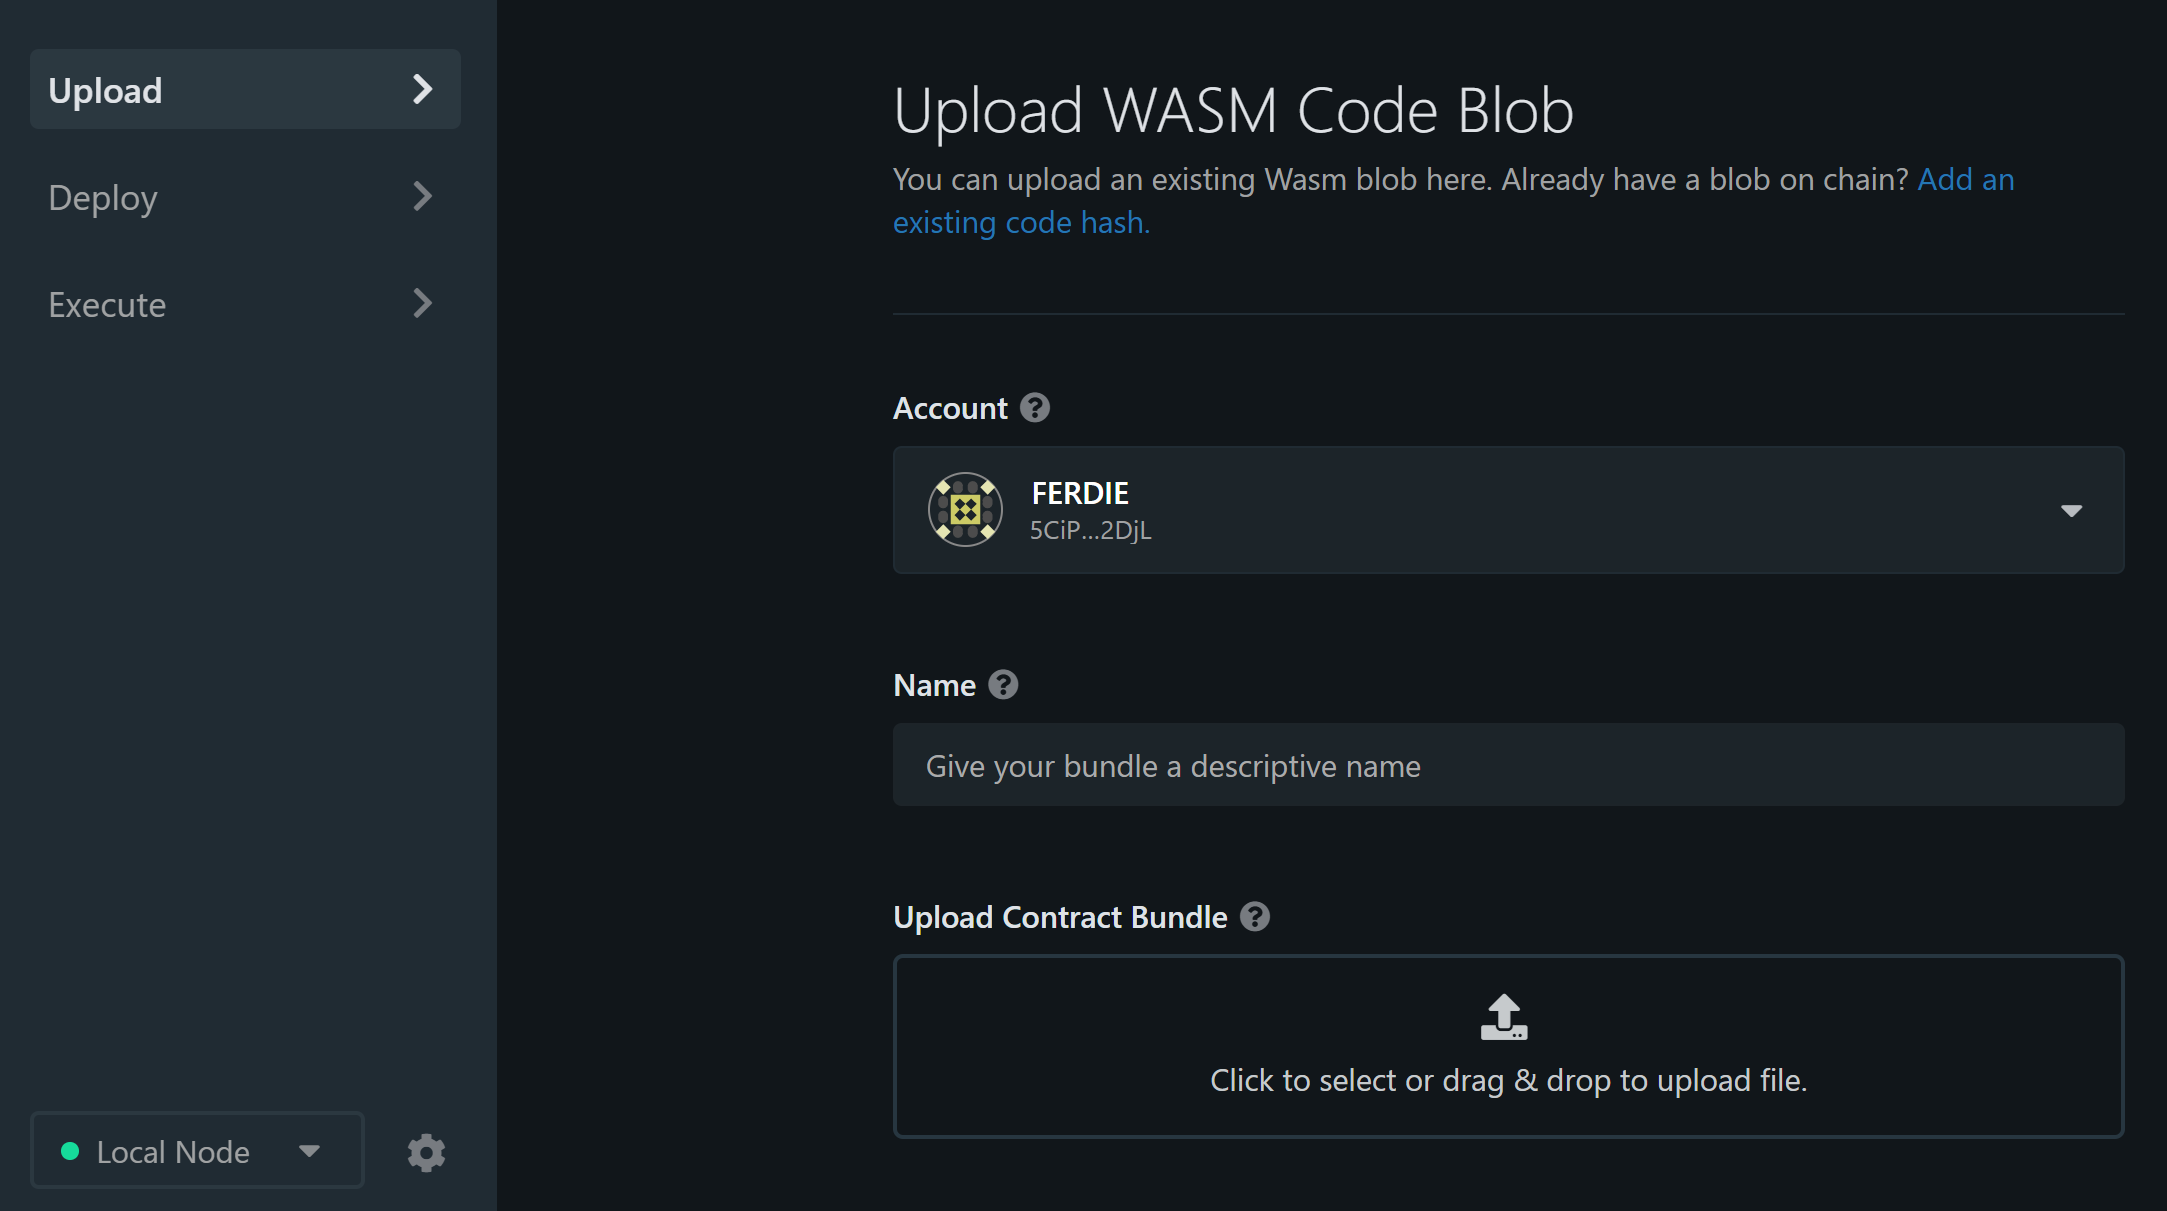
Oh, there’s something inconsistent between the tutorial and the UI I’m looking at.
The tutorial says to upload the .wasm and the metadata.json file separately, with screenshots that correspod to that process; the current canvas-ui though says to upload a “contract bundle”:
The .contract bundle or ABI for for WASM code code. If using an ABI, you will need to upload the generated WASM file separately.
This suggests to me that newer revisions of the toolchain create a .contract
file that contains both the wasm and the metadata.
I intend to figure out how to use that,
but first I’m going to try to upload them separately.
When not uploading a .contract file,
the help text seems to suggest I need to upload the “ABI” (metadata.json)
first.
So naturally I do not do that and attempt to just upload the wasm file.
It gives a reasonable error about “invalid ABI file”.
I do the proper thing and first upload the ABI file.
The tutorial indicates that the ABI is optional, but that doesn’t seem to be the case any more: you’ve got to upload the ABI first, then then the binary.
After I click “upload” the UI says “contracts.putCode queued”, and I am given the opportunity to “sign and submit”.
This all seems pretty straightforward, and I’m going to stop following the tutorial and just play around a bit.
The “Deploy” tab now lists my contract, or “code bundle”.
In substrate there is a difference between the contract binary and a deployed instance of the contract. So far I’ve uploaded my flipper contract to my canvas devnet, but have not deployed a instance of the contract yet. Now I need to create an instance.
I click “Deploy”.
That takes me to a page where I can manipulate the constructor. Part of that is to provide the contract an “endowment”. I don’t know what that is but I am guessing it is for paying rent for space on the blockchain. I wonder if I as a contract owner need to keep filling up a contract’s endowment.
I click “Deploy” again (this is a different deploy button).
The page I’m presented with is a bit of a mess: it is titled “contracts.instantiate”, and underneath it is this explanation:
Instantiates a new contract from the
codehashgenerated byput_code, optionally transferring some balance. Instantiation is executed as follows: - The destination address is computed based on the sender and hash of the code. - The smart-contract account is created at the computed address. - Thector_codeis executed in the context of the newly-created account. Buffer returned after the execution is saved as thecodeof the account. That code will be invoked upon any call received by this account. - The contract is initialized.
Now this may or may not be good documentation, but it is presented all wrong here. It seems like this is a markdown list that has been concatenated into a single paragraph.
Something has gone wrong here.
I wonder if I could fix this, but feel like that would be a big bikeshed for my immediate goal of finishing this blog that I have been working on for way, way too long.
I see a message that says “contracts.instantiate queued”, and I click “sign and submit”.
As the deployment process is working I am temporarily navigated back to the deployment page, where i logically don’t think I should be; then when the deploy finishes I am automatically nagivated to a page that says “contract sucessfully deployed”.
Now I can go to the “Execute” tab to play with the contract.
Executing the contract in the canvas-ui
Oh, after experimenting I get it.
There are two ways to call contract methods:
RPC calls, and transactions.
Transactions are run on-chain,
and can modify the chain state;
PRC calls are just queries and for calling read-only methods.
Our flip method writes to the chain,
while our get method just queries the chain.
So flip should be called as a transaction,
and get should be called as an “RPC call”,
though presumably can be called as a transaction.
The UI doesn’t seem to be particular about which methods
are called in which way,
though it does change its default based on which method I’ve selected.
That is, when I select the flip method,
which has a little disk icon next to it seemingly indicating that it performs writes,
the UI selects “send as transaction”;
when I select the get method,
which does not have the disk icon,
the UI switches to “send as RPC call”.
So I think I get all that. It’s like Ethereum.
When I call get as an RPC call the resulting boolean is printed correctly;
When I call flip as a transaction, then get again as an RPC call the resulting
boolean has changed.
Incidentally, the UI for the contracts.call page exhibits
the same documentation rendering errors I saw on the
contracts.instantiate page,
with seemingly-markdown formatted documentation being
splatted into an HTML paragraph without proper formatting.
There is an issue open that seems related.
The contract bundle
As indicated earlier,
the canvas-ui mentions a .contract bundle,
and I don’t know how to make it.
Can I figure it out?
The --help for cargo-contract doesn’t offer any new commands
that indicate they would create a .contract file.
The cargo-contract readme though has some tantalizing
tidbits about deploy and instantiate commands.
The deploy and instantiate subcommands are disabled by default, since they are not fully stable yet and increase the build time. If you want to try them, you need to enable the
extrinsicsfeature.
I decide to build cargo-contract myself.
I clone the repo and inside it run
cargo install --path . --features=extrinsics
While that’s building in ripgrep the cargo-contract source for “.contract”.
I quickly discover that the most recent version onf cargo-contract
has a different set of subcommands than the version 0.7.1 we installed.
Our build command is described as
build - Compiles the smart contract
With an additional command
generate-metadata - Generate contract metadata artifacts
More recent,
but yet undeployed,
versions of cargo-contract have no separate generate-metadata subcommand.
Instead their build command is
build - Compiles the contract, generates metadata, bundles both together in a ‘.contract’ file
So now our goal is to use the most recent build of cargo-contract
to build our flipper into a flipper.contract file,
upload that to the UI;
then finally,
use the deploy and and instantiate commands
to deploy flipper directly from the command line,
like hackers do.
Then we’re going to be done. I’ve got to stop and publish this blog post soon. It’s too many words now. Way too many words.
In my flipper directory I run
cargo +nightly contract build
...

Original wasm size: 19.1K, Optimized: 2.5K

Your contract artifacts are ready. You can find them in:
/home/ubuntu/substrate/flipper/target

  - flipper.contract (code + metadata)
  - flipper.wasm (the contract's code)
  - metadata.json (the contract's metadata)
This custom-built cargo-contract seemingly includes the wasm-opt
tool from binaryen and minimized my contract from 19k to 2.5k.
That’s super.
And now I have the flipper.contract file.
To start clean, I restart both canvas-node and canvas-ui.
I go through the same deployment process with the UI,
but this time using the flipper.contract file.
Everything works as expected.
Wiping the dev chain
I want to try to deploy my contract from the command line.
Ok, this is the last thing I’m doing today. For a developer, deploying using a UI seems silly. I want to do it from the command line.
Remember I’ve built my own version of cargo-contract
with the unstable extrinsics feature.
This feature adds the deploy and instantiate
commands to cargo-contract.
Let’s see if we can figure out what to do with them. Again I restart my canvas node and UI to start fresh.
After restarting the chain,
I notice that the UI is still showing
my previously-uploaded and deployed contracts.
I don’t understand.
The --tmp flag to canvas is supposed to create a temporary chain
that gets wiped every time its shutdown.
I can’t look into that now.
Aside: canvas-ui gets out of sync with the on-chain state
I do look into it.
After some experimentation, I discover that canvas-ui seems to be storing its own cache of uploaded and deployed contracts, and that becomes incorrect after the dev chain is wiped.
As an example,
I uploaded a contract.
Restarted the --dev --tmp chain.
The UI still shows the contract as being uploaded.
I then deploy that contract in the UI.
The deployment fails with
system.ExtrinsicFailed
contracts.CodeNotFound
For now I just click the “forget” buttons in the UI to make the UI forget about them.
Later, coming back to the tutorial, I note this is mentioned specifically
The Polkadot UI uses its own local storage to track the contracts that you have deployed. This means that if you deploy a contract using the UI, and then purge your Canvas node, you will still see the old contracts in the UI even though they do not exist on-chain!
You can simply remove any old artifacts from the UI or reset your local storage. So remember, when you start a new chain with the –tmp flag or use the purge-chain subcommand, you will need to re-deploy any contracts and re-do any steps that you may have done before on your node.
(Failing to) deploy from the command line
I ask for --help for both the deploy and instantiate subcommands:
$ cargo contract deploy --help
cargo-contract-deploy 0.7.1
Upload the smart contract code to the chain

USAGE:
    cargo contract deploy [OPTIONS] --suri <suri> [wasm-path]

FLAGS:
    -h, --help       Prints help information
    -V, --version    Prints version information

OPTIONS:
    -p, --password <password>    Password for the secret key
    -s, --suri <suri>            Secret key URI for the account deploying the contract
        --url <url>              Websockets url of a substrate node [default: ws://localhost:9944]

ARGS:
    <wasm-path>    Path to wasm contract code, defaults to `./target/<name>-pruned.wasm`
$ cargo contract instantiate --help
cargo-contract-instantiate 0.7.1
Instantiate a deployed smart contract

USAGE:
    cargo contract instantiate [OPTIONS] --code-hash <code-hash> --data <data> --suri <suri>

FLAGS:
    -h, --help       Prints help information
    -V, --version    Prints version information

OPTIONS:
        --code-hash <code-hash>    The hash of the smart contract code already uploaded to the chain
        --data <data>              Hex encoded data to call a contract constructor
        --endowment <endowment>    Transfers an initial balance to the instantiated contract [default: 0]
        --gas <gas>                Maximum amount of gas to be used for this command [default: 500000000]
    -p, --password <password>      Password for the secret key
    -s, --suri <suri>              Secret key URI for the account deploying the contract
        --url <url>                Websockets url of a substrate node [default: ws://localhost:9944]
This all looks complex. I don’t know what a “secret key URI” is, nor the password for the secret key.
I do know that my --dev chain created some accounts for me.
I look in the keystore directory of the temporary chain.
There’s nothing there.
I imagine there’s a substrate CLI client that can communicate with my canvas chain over RPC, and that may be able to help me figure out what my “secret key URI” and “secret key password” are, but I can’t find such a tool by googling.
I ask in the “Smart Contracts and Parity Ink!” Matrix channel (#ink:matrix.parity.io):
I am trying to deploy and instantiate a contract using a custom-built cargo-contract with the extrinsics feature. The ‘deploy’ and ‘instantiate’ commands require a “secret key uri” and “secret key password” that I don’t know how to find for my canvas devnet. Can somebody help me understand what these are and how to obtain them?
@danforbes replies to me:
You probably just need to the key for some account with enough funds to deploy and instantiate the contract…I don’t think the key is specific to the node in any way If you’re running the Canvas node in dev mode, these are the accounts that are pre-funded https://github.com/paritytech/canvas-node/blob/master/node/src/chain_spec.rs#L76
People typically use Alice…her information is here https://substrate.dev/docs/en/knowledgebase/integrate/subkey#well-known-keys I guess you’d just leave the password blank
So the secret key URI will be
bottom drive obey lake curtain smoke basket hold race lonely fit walk//AliceI think
Great leads, @danforbes.
From here I learn about the subkey command, which seems useful, and I install it according to the docs from the Substrate Developer Hub:
cargo install --force subkey --git https://github.com/paritytech/substrate --version 2.0.0
I can run subkey for the built-in Alice account:
subkey inspect //Alice
Secret Key URI `//Alice` is account:
  Secret seed:      0xe5be9a5092b81bca64be81d212e7f2f9eba183bb7a90954f7b76361f6edb5c0a
  Public key (hex): 0xd43593c715fdd31c61141abd04a99fd6822c8558854ccde39a5684e7a56da27d
  Account ID:       0xd43593c715fdd31c61141abd04a99fd6822c8558854ccde39a5684e7a56da27d
  SS58 Address:     5GrwvaEF5zXb26Fz9rcQpDWS57CtERHpNehXCPcNoHGKutQY
As far as I can tell this is not doing any RPC communication with my chain,
just manipulating keys.
I note that the “SS58 address” corresponds to the mostly-elided address displayed in canvas-ui for Alice.
Let’s see if I can deploy a contract.
I first try to deploy the “flipper.contract” file,
but expect it won’t work, since the --help for cargo contract deploy mentions wasm files:
$ cargo contract deploy --suri //Alice target/flipper.contract
ERROR: Scale codec error: Error decoding field RuntimeMetadataPrefixed.1

Caused by:
    Error decoding field RuntimeMetadataPrefixed.1
Yep. Nope.
Let’s try deploying the wasm file instead.
$ cargo contract deploy --suri //Alice target/flipper.wasm
ERROR: Scale codec error: Error decoding field RuntimeMetadataPrefixed.1

Caused by:
    Error decoding field RuntimeMetadataPrefixed.1
Nope.
Let’s try deploying the metadata.json file instead.
$ cargo contract deploy --suri //Alice target/metadata.json
ERROR: Scale codec error: Error decoding field RuntimeMetadataPrefixed.1

Caused by:
    Error decoding field RuntimeMetadataPrefixed.1
Welp, that’s all the files I’ve got!
Anyway, I give up on this. It seems like for now the way to deploy a contract is to do it through the web UI.
The readme did warn me. I have noone to blame but myself.
In conclusion
I have been working through this for over a week. Obviously, most of why it’s taken my so long is that I have written down every thing I’ve done. And I’ve taken pretty much every possible detour I could.
Even though I didn’t write any Ink code yet (just used its pre-written example), I am quite satisfied with everything I learned about how Ink and Substrate work.
There’s a lot more to learn about writing smart contracts for Substrate and I’ll come back eventually, and probably blog about that too.
I’m only a 3rd a way through the “Substrate Contracts Workshop” tutorial: literally only completed the “Getting Started” section; haven’t even begun the “Basics”.
So here’s my impression of Substrate and Ink so far:
It seems like a super powerful system, filled with potential. Just seeing all the building blocks that I could use charges up my imagination.
I can easily imagine that all this flexibility is going to become hard to maintain and understand over time, as more substrate chains, with new configurations, come into existence and need to continue working, upgrading, and interoperating.
I don’t envy that hard engineering work for the Parity team.
There are a lot of fun toys here to play with, but also a lot of depth to comprehed.
I have only just begun to use ink, but it is so far exactly what I currently expect from a Rust implementation of smart contracts: it uses macros to hide lots of runtime setup, to make the actual definition of the program look a lot like an Ethereum developer might expect. It is similar to how NEAR Rust contracts work.
The custom tooling here is an a pretty good state, such that developers aren’t going to be managing the details of building Rust with the right options to target Substrate chains, and they have easy access to local devnets. But there is plenty of evidence of immaturaty, as I saw bugs in the web UI, and there are important features like command-line deployment yet missing.
I’ll continue this exploration into Substrate and Ink in the future.